Download and Create the jOrgan Pup 2011.6 Boot CD
Navigation: Go to End of Page
Welcome to the jOrgan Pup 2011.6 Download and CD creation page.
If you have not reviewed the release notes, feel free to do so at the Release Notes of jOrgan Pup 2011.6 page.
Download
Before you download the CD image, you will need to agree to the various jOrgan Pup Licenses. By downloading the CD ISO image you state that you have agreed to these licenses:
jorganpup20116.rar (Approx 620Mb) THIS LINK IS NO LONGER FUNCTIONAL.
The CD image has been compressed using the RAR compression format, so once you have downloaded the file you will need to decompress it. Windows users can use WinRAR, Linux users can use RAR, Ark or FileRoller.
[This link has been kindly provided by Panos, many thanks from all of us!]
Creating a Boot CD from the image file
The first step is to create the bootable CD by burning the ISO image to a CD using your favorite CD/DVD burning application (i.e. Nero). Use the Burn CD Image option.
Once you have created the CD, then you will need to boot your computer with that CD. Some computers are automatically configured to start their boot cycle with whatever is in the CD drive, others are configured for other data storage devices (USB or HardDrive). Edit the boot cycle of your computer's BIOS to enable it to boot from the CD.
First Boot of jOrgan Pup 2011.6
Once you have booted the CD you will see the Puppy 5.2.5 boot screen, and then a whole bunch of text messages as Puppy informs you of what it is loading.
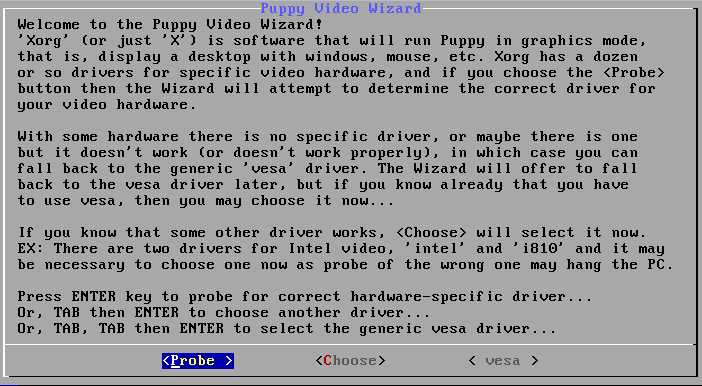
Eventually you will be presented with the Graphics/Screen configuration dialogue.
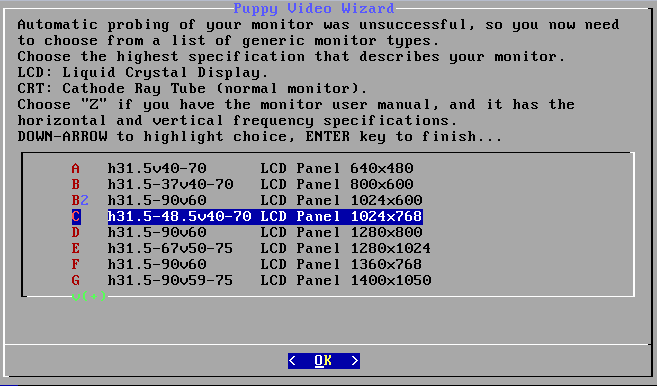
Select the 'Probe' option to automatically configure your graphics hardware and select the resolution to continue.
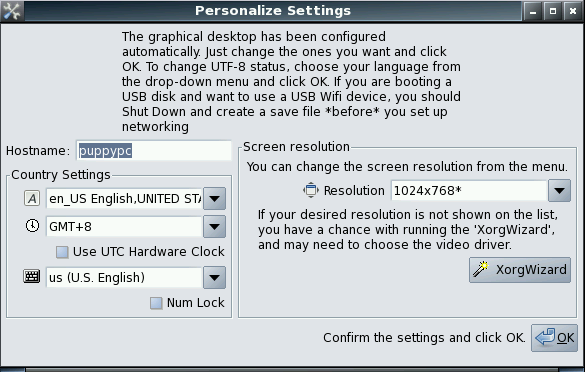
The jOrgan Pup 2011.6 desktop will then load, and the first boot options dialogue screen will show.
You can click on 'Ok' or configure Puppy to your personal requirements.
When the boot options dialogue screen has been closed, Jack Control will have loaded and you will be able to start with your audio testing configuration.
Creating a SAVE File
This option saves a file onto your harddrive or USB Memory stick that contains the working file system of Puppy Linux. When you boot into jOrgan Pup using the CD, the data contained in the save file is loaded using a layered file system, so that your changes load on top of the jOrgan Pup CD, allowing you to keep the modifications that you have made to configure jOrgan Pup to your system.
-
Click on Menu - > Shutdown -> Reboot computer
-
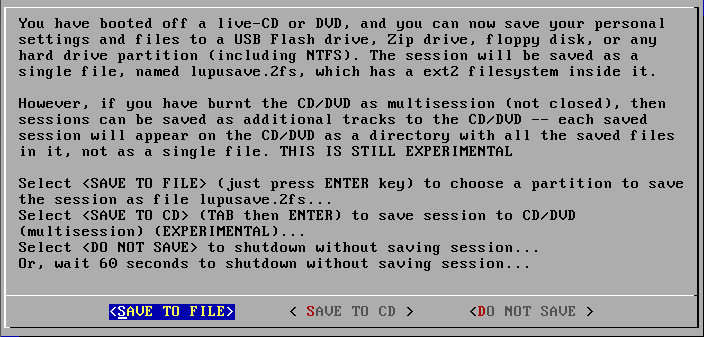
Within the shutdown sequence...
-
Select Save to File
-
Then select OK
-
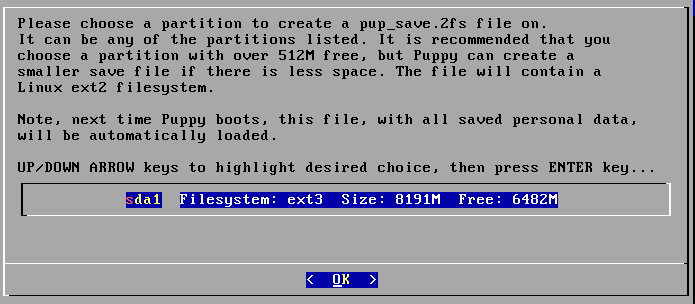
Now select where the saved file is to be located (if you are unsure what the numbers and letters mean here, just let me know and I'll help you with them)
-
Select OK
-
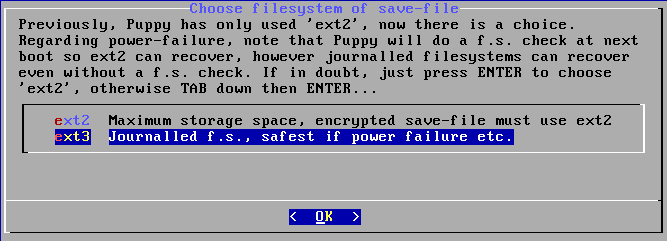
Next, select the ext3 file system
-
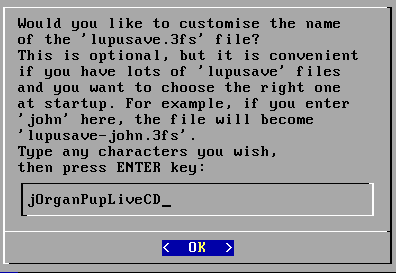
In the Name text box, type in something like jOrganPupLiveCD or something that makes sense to you.
-
Then select OK
-
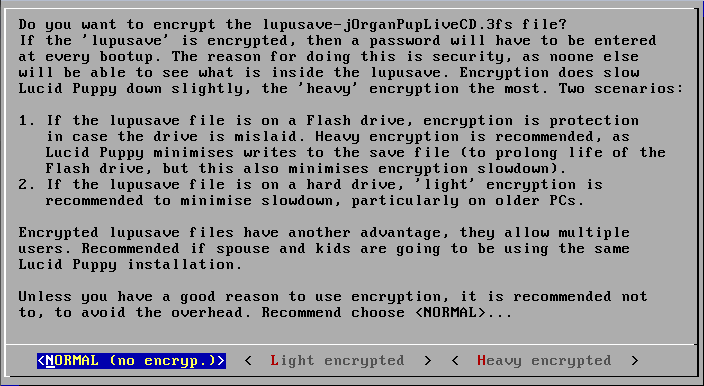
Select Normal (no encryp.)
-
Now select the size that suits your environment (I use option 8 - 1.25 GB)
-
Then click on Yes, save
-
Then wait for the save file to be generated... this may take quite a while
-
Select Yes regarding the 'Copy lupu-525.sfs' question (this will speed up your boot sequence from the CD)
-
Leave the jOrgan Pup CD in the drive
-
The computer will now reboot back into jOrgan Pup 2011.6 (if you need to press F8 or some other boot option please do so), using the settings that you have now saved
You will still need to boot using the Puppy CD, but everything will be run using the save file space, so anything you save will be usable after a reboot.
Also see Installing to USB or Harddrive
Next : Configuring Your Audio and MIDI
Navigation
